Wakanda Cloud extension
The Cloud Extension allows you to interact with the Wakanda Cloud Service from Wakanda Studio.

Publishing your application
At any moment during your development, you can publish your application to Wakanda Cloud by clicking on the Cloud button.
Once published, you can update your remote application by simply clicking on the Cloud button or on the Publish menu item.
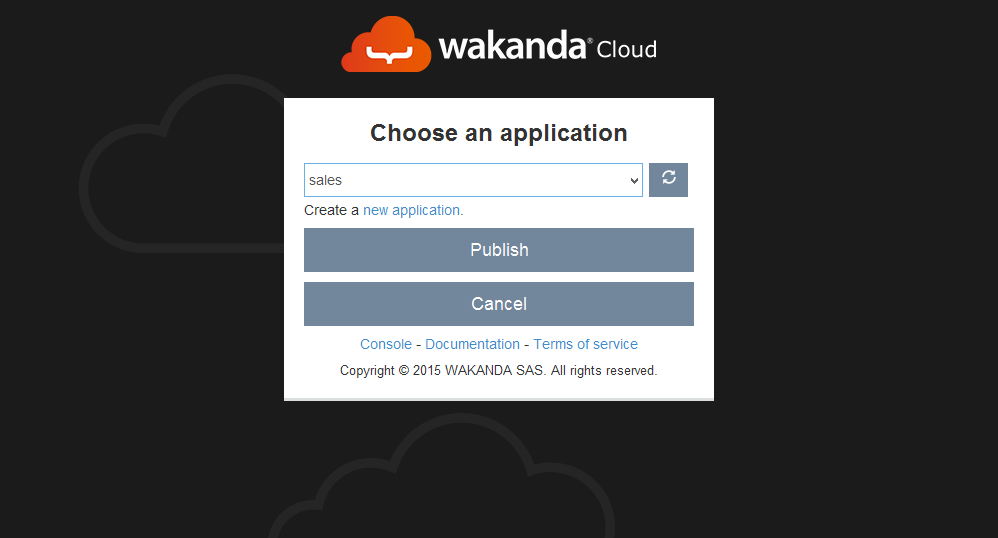
Publishing for the first time
To deploy your application to the cloud for the first time:
- Open your local application in Wakanda Studio.
- Click on the
Cloudbutton. - Type in your Wakanda Cloud credentials.
- Select the target remote application.
- Click on the
Publishbutton.
Updating the remote application
After the first deployment, you can update your remote application by clicking on the Cloud button or the Publish menu item. If you want to be able to choose the files to publish to the remote application, disable the Auto-Commit option.
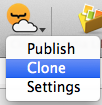
Cloning the application
The clone feature allows you to download your entire remote application, including its modifications history.
To clone an already published Wakanda application, click on the Clone menu item
Select the source application from the list and click on Clone.
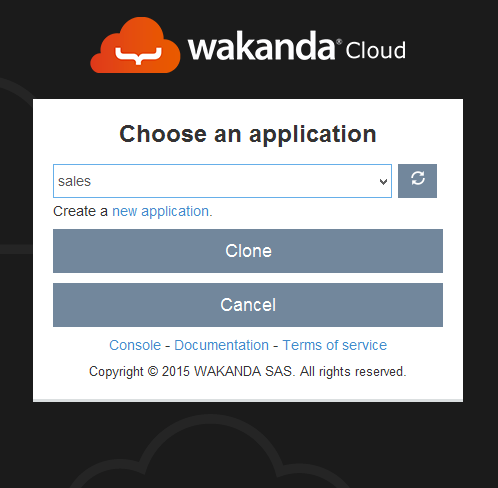
Once the application is cloned, the solution will be opened automatically in Wakanda Studio.
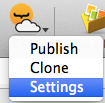
Settings
You can customize the behaviour of the Wakanda Cloud Studio Extension via the settings menu item
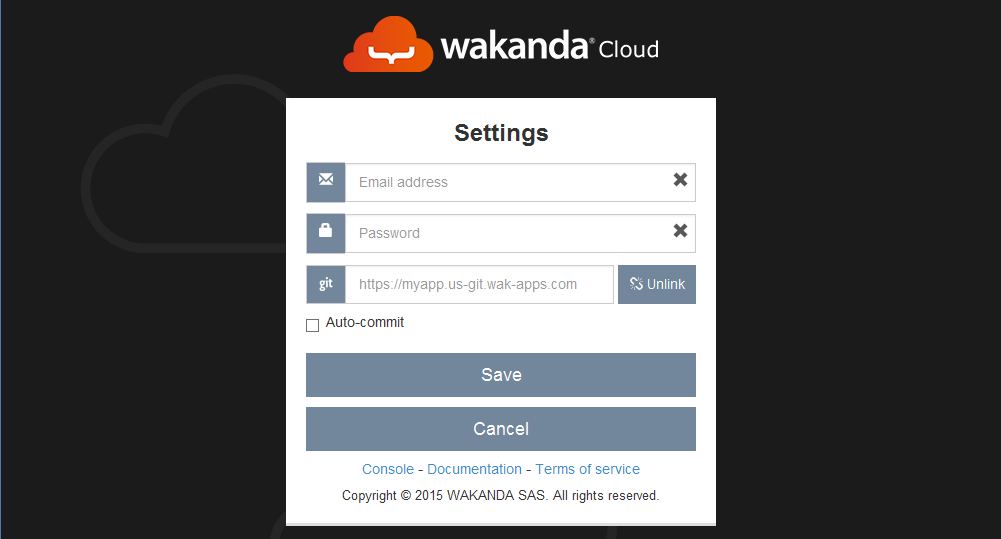
Wakanda Cloud credentials
To edit your Wakanda Cloud credentials just type the new values in the corresponding fields. It is also possible to completely remove your existing credentials by emptying both the login and password fields.
To save your modifications click on Save.
Remote Git Repository
You can configure the default target remote application for each Wakanda Solution by typing in the URL in the git field. This will avoid you having to select a target remote application each time you perform a publish operation.
To save your modifications click on Save.
Once configured, the remote application will be linked to your local one. To unlink it, simply click on the Unlink button in the settings dialog.
Auto-commit
When enabled, this feature allows the studio to publish all the local modifications to the remote application automatically.
If, otherwise, the auto-commit checkbox is disabled, you will be asked to choose the files to be published to the remote application whenever you click on the Cloud button or the Publish menu item.
